Izatrini: My Trinidadian Dahl Recipe
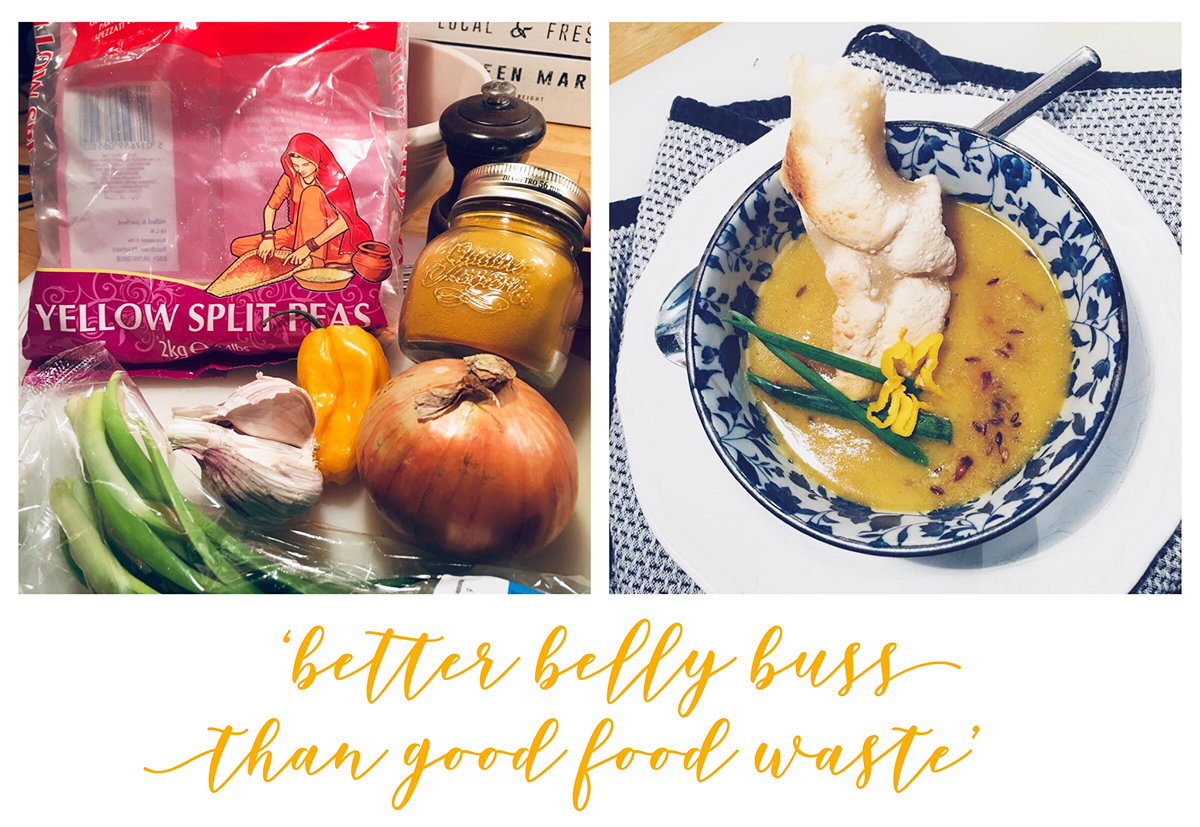
I guess I’m on a budget kick lately. Everything I’ve been cooking has been under ten euro, all-in. I think maybe it’s the season, but it’s never a bad idea to watch your wallet. However, never sacrifice taste for money. This recipe is the epitome of big flavor for little dough. Made from split yellow lentils, dahl is packed with nutrition, spice and good feeling. I’ve made it here with jeera (cumin) papadom; but, please, if you can find or make roti (trini flatbread) it is much better. There is decent frozen roti at Vii-Voan if you live in Helsinki. I’ve linked to a recipe for dhalpuri because there is the best description of roti. For dahl, I prefer just regular roti… so skip the filling part if you will make your own.
I learned this recipe from my stepmother who is from Trinidad. She lives in Fort Lauderdale and every time I visit my father, we all go to have trini food together at Joy’s. I warmly recommend Joy’s, but the last time I visited we went to a trini buffet and they had dhal to start. I’d never had it before so I just ate it without thinking. It’s one of the single most joyous moments of my life. I’ll remember it forever. Gillian was so happy that I liked it and I begged her to teach me to make it. Now that I’m back in Finland, a few of her ingredients are difficult to find. So I have altered the recipe a touch, for location’s sake alone. Maybe I’m sentimental, but I find it to be a soulful food and I am so happy to share it from the bottom of my heart. My father and I are also trini, but I have never had the opportunity to visit. Carnival is on my bucket list and I will see you soon, homeland.
Ingredients (4-5 servings):
1 cup split yellow lentils
1 tsp turmeric powder or trini saffron powder
One quarter yellow onion, minced
2 spring onions or a nip of chives
4 cloves garlic
1 scotch bonnet pepper (substitute habanero)
a heaping teaspoon of cumin seeds
2 tbsp coconut oil
sea salt
black pepper
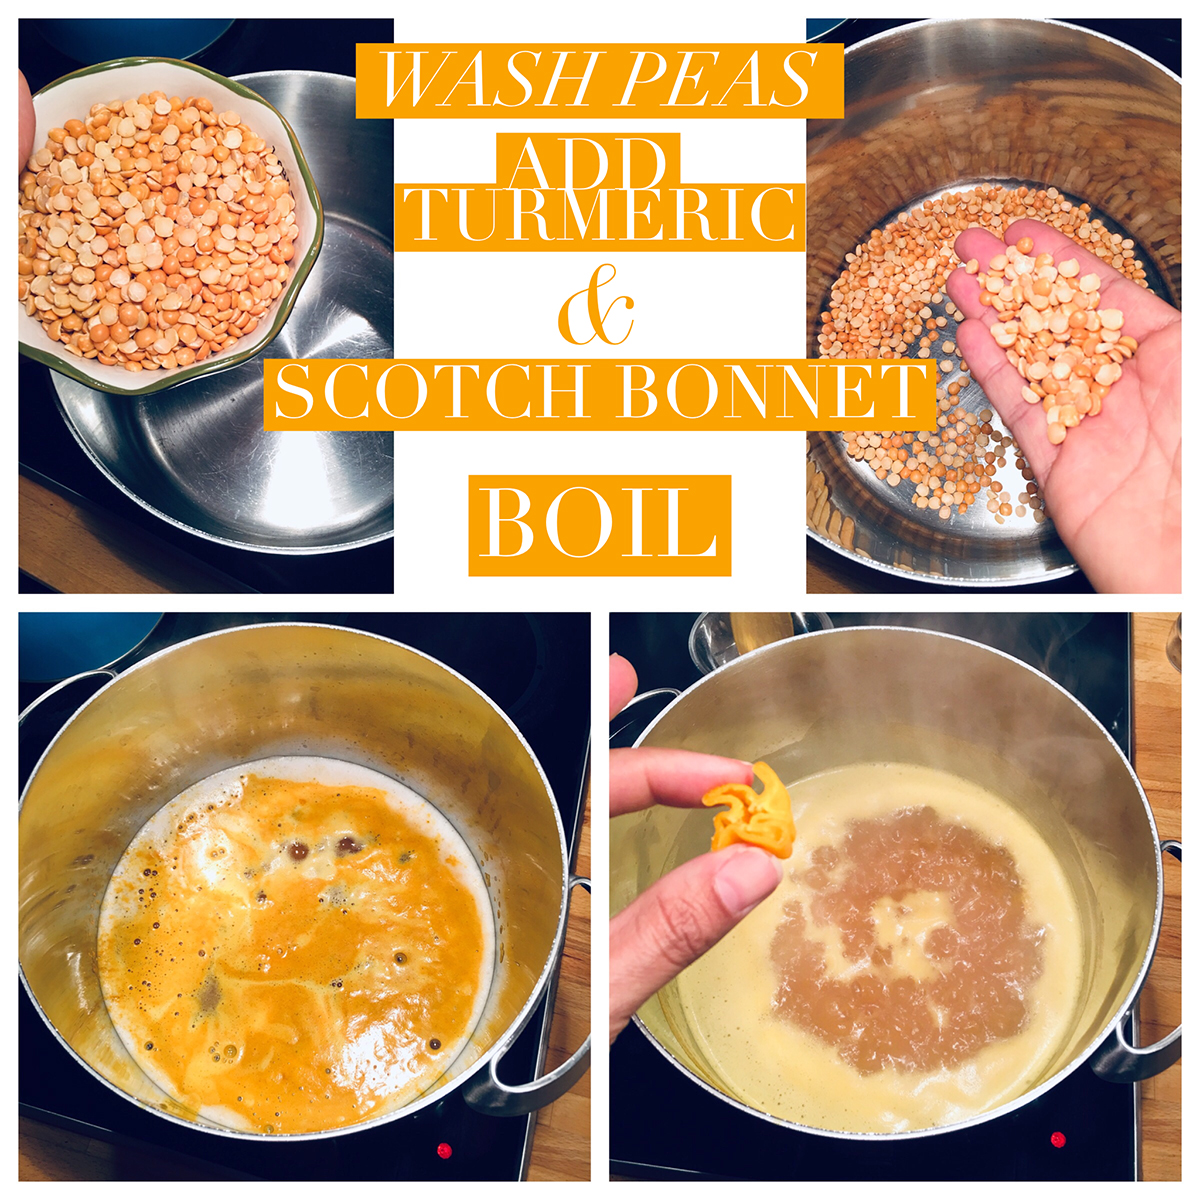
Directions: Begin by sorting and washing the lentils. There are sometimes small stones inside bags of split and whole lentils. To remove, pour into your hand and sort as they fall through into the pot. Remove any stones you find and then cover the lentils with cold water. Allow to soak briefly and then strain out the water. Cover the lentils with at least ten cups of water. You will need a deep stock pot for this recipe. The pot will cook uncovered and so much of the liquid will evaporate. Dahl can be eaten as a thick or thin broth. I prefer the thin. Reduce the amount of water if you’d like a more stewy texture.
Smash two of the garlic cloves with the back of your chef’s knife and toss into the pot. Likewise, throw in the entire scotch bonnet, destemmed. I like a hot soup, spicewise, but more heat can be added later. By using the whole scotch bonnet without cutting, you will get the flavor of the pepper without as much of the heat. Remember to remove it before puréeing! In the picture, I’ve used a half scotch bonnet with seeds because I like playing with fire. Finally, add the teaspoon of turmeric or trini saffron. Allow the pot to a boil and then keep at a low boil until the lentils are soft. This means that they will smash easily on the side of the pot using the back of a spoon. You can’t really overboil, but you can underboil this one. Err on the side of too long. While boiling, a light foam may appear atop the lentils. Use your spoon to scoop it away and discard. I also keep a tea kettle at boiling so I can add more water as needed during the boil. If you add cold or room temperature water, it will slow your cook time. Adding boiling water will help keep you on track. At the end you’ll want to have about a five to one ratio of water to lentils.
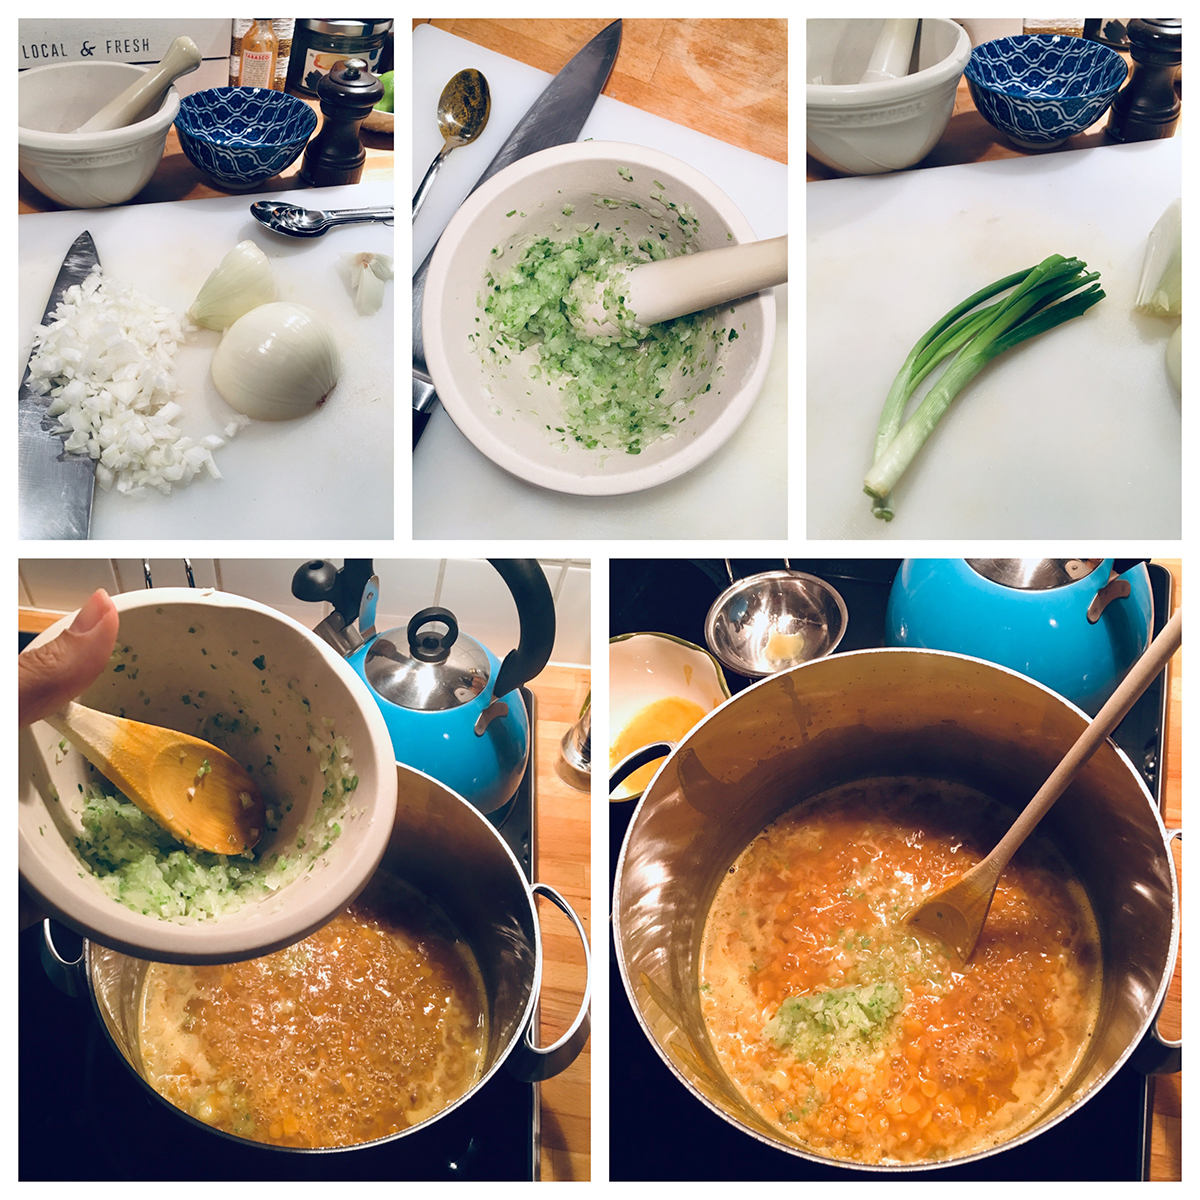
Directions cont.: Meanwhile, prepare your aromatics! Mince the quarter onion and the white and light green parts of the spring onions well and add to a mortar and pestle. If you have a food processor or mini prep, you are in luck. This step is much quicker with robot help. Either use the mortar and pestle to smash them to tiny pieces and a little bit of liquid, or pulse the food processor three times and be done with it! I add a tiny bit of coarse sea salt during this step to help release a bit of liquid and break down the vegetables. Once the lentils are sufficiently soft, add the smashed vegetables to the broth. Let the mixture simmer for ten minutes and then add salt and pepper to taste. Remove the scotch bonnet! Use an immersion blender, or transfer the broth in batches to a normal blender, to purée until smooth. There’s a little leeway here. I don’t like chunky dahl, but maybe you do and that’s ok. Return to the stockpot and low heat.

Directions cont.: The Chongkay. This is a trinidadian term for heating garlic in hot oil and then throwing into a waiting pot producing a loud sizzle. Long description, but a tasty one. In India I think they just call it tempering. Anyhow, you’ll need to add whatever salt and pepper you plan to use to the broth at this point. Once you do the chongkay, you don’t want to stir the pot any more. Keep the broth on one burner at low heat, no bubble. Smash the remaining two cloves of garlic with the back of your chef’s knife. Continue smashing until there are small bits of garlic left. It will look like a mince, but a little larger. Have the cumin seeds at the ready. Keep your wits about you and heat a sauté pan with medium high to high heat. This step goes fast and can be ruined just as quickly. Add the coconut oil and heat until shimmering before adding the garlic to the pan. Toss toss toss! Keep the garlic moving in the pan so it browns evenly. Let it get golden brown before throwing in the cumin seeds and continuing to toss and brown. Let the whole mess get dark brown, chocolate brown, the cumin seeds will start popping, almost black but not black….. and then then chuck it quickly into the waiting broth. If you’ve done it correctly it will make a loud sizzle. That sizzle is happiness. Listen, if it gets black, just start over. The broth will wait. But if you throw in charcoaled garlic, you will regret it!
Turn the heat off completely and allow the oil, garlic and cumin to rest atop the soup for five minutes before serving. Again, don’t stir. Just dip down through the oil with your ladle so you get broth and temper in one scoop. Serve with roti or plain rice. I garnished with the green tips of the spring onion and a slice of fresh scotch bonnet. If you have some trini pepper sauce, make good use of it now! I have my own recipe, but it’s coming to the grave with me. Some things are sacred.