
I’ve named this recipe Corner Store Lasagna because all of the ingredients I used can be purchased from just about any store, large or small. My specific corner store is the smallest place I think I’ve ever called a store, but I do have to give it up for their buyers… they do a wonderful job of stocking with such little space. I also kept an eye on the budget for this one. I think it’s great to splurge every now and again on a fantasy meal cooked from home. I love experimenting with ingredients and stretching the boundaries of my culinary imagination. However, I definitely appreciate the go-to basics that don’t break the bank and can be made multiple times no muss, no fuss, no tears. The first time you make this recipe you might be dissauded by the prep time. But, once you get used to the process it goes quite quickly and you’ll have plenty left for a couple more lunches or dinners. For budget and location’s sake, I broke a lot of rules regarding a classic lasagna recipe but I think it really turned out beautifully.
Ingredients (4-6 servings):
500g diced tomato with basil (I used canned)
500g cottage cheese (raejuusto)
200g grated mozzarella/emmental mix blend
1 red bell pepper, dice
1 smallish zucchini (kesäkurpitsa), quarter then thick slice
2 medium carrots, brunoise
50g fresh spinach
1 medium yellow onion, thick slice
4 cloves garlic, 2 sliced and 2 minced
A handful of dried ceps (herkkutähti)
1/3 cup red wine (I used a tempranillo I had leftover)
A splash of balsamic vinager
Fresh oregano
Lasagna pasta
3 tablespsoons extra virgen olive oil
Sea salt, black pepper
Crushed red pepper flakes
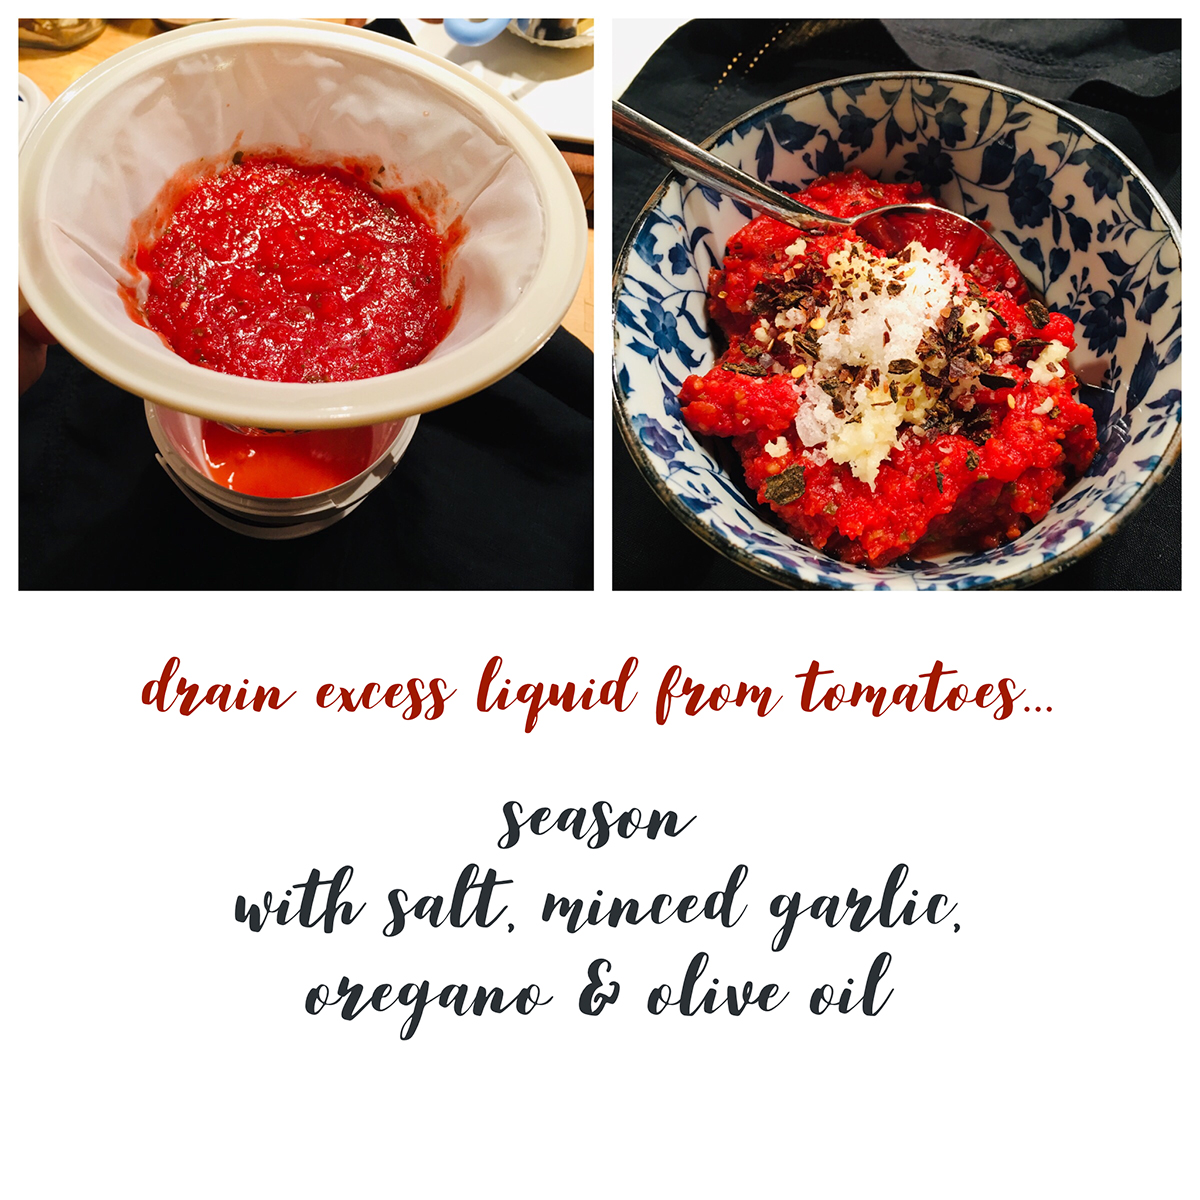 Directions: First things first, your tomato sauce (whether canned or homemade) is going to need to drain. There’s nothing worse than a soggy lasagna! One way to avoid that pitfall is by eliminating any source of excess liquid beforehand. If you don’t have a cloth sieve, you can use a normal fine meshed sieve or a piece of cheesecloth draped over a colander. You’ll lose a bit of the tomato with the liquid with the alternate methods, but it’s not going to break any deals. If you set up your sieve and let the sauce drain while you’re prepping the vegetables, you’ll save a bit on time. At the same time, add the dried ceps to the wine to soak. If you want, you can add just a touch of veggie broth to the mushroom and wine mix. Also, preheat your oven to 425 °F or 218 °C.
I mean, lasagna is meant to be rustic, no? So I didn’t think too long on the size of the dice or slice except to imagine the size of my mouth and if it would fit in there! Cut the red pepper, zucchini and onion to roughly the same size and slice two cloves of the garlic thinly. I did a brunoise with the carrots because I’m not entirely certain how I feel about cooked carrot still… at forty… so I wanted them to disappear into an unseen background flavor. They will soften much slower than the other vegetables; so, if you decide to leave them a little larger than I did, just remember you might want to start sweating them first.
Once you have everything ready, heat two tablespoons (maybe a smidge more) olive oil over high heat. In this step we want to carmelize the vegetables (bell pepper, onion, carrot, zucchini and garlic) to add another layer of flavor. Attention, worse than soggy lasagna is mushy lasagna! The goal here is nicely browned but still crunchy. If your pan is not big enough to hold everything without crowding, work in batches. If you crowd the pan, the vegetables just release their liquid and then boil/steam which will produce no color and no extra flavor. I threw everything all in at once, except half of the zucchini and I was dead wrong about the size of my pan. I was overcrowding like nobodies’ business! Luckily I saved half the zucchini and I was able to get some browning going on that. Don’t forget to add salt and grind some fresh pepper over each batch! Don’t go crazy, but it needs a bit.

Directions cont.: Empty the pan, return it to the heat and add just a bit more olive oil. Once the oil is shimmering, toss in the remainder of the zucchini and get a nice brown going. Push the zucchini to the outer edges of the pan and then add the spinach leaves to the center. These don’t really need to cook, per se. You’re just looking to get them coated in a bit of the oil and wilted down just a little. Add the spinach and zucchini to your other batches and return empty pan to the heat.
Add a splash of balsamic vinegar to the hot pan and let it sizzle for about thirty seconds, then add the ceps/wine/broth mixture and a sprig or two of fresh oregano and continue reducing until the liquid has thickened significantly. Remove the pan from the heat and add the mushroom reduction to the cooked vegetables and set aside.

Directions cont.: Congratulations! All the heavy lifting is done and you’re more than halfway to the yum goal! Now that the tomato sauce is sufficiently drained, add about a teaspoon of sea salt, a half teaspoon of crushed red pepper flakes, the two minced garlic cloves, a tablespoon of extra virgen olive oil and a few oregano leaves. Mix together and set at your assembly station. Your what? Your assembly station!
We’ll get to that in a second, but first the cottage cheese. Traditionally one would use ricotta, but my lovely corner store did not have any. It’s also quite a bit more expensive than cottage cheese. So, I cheated! I normally don’t use much kitchen equipment other than pots, pans and elbow grease, but you will need a blender or food processor for this step. Add half of the cottage cheese (including some of the liquid) to the blender and pulse until smooth. Mix together the blended cottage cheese, remaining cottage cheese (drained) and the cooked vegetables. Taste and add salt and pepper as needed.
At your assembly station you will need the tomato sauce you’ve seasoned, the cottage cheese and vegetable mixture, the grated cheese mixture, lasagna pasta (uncooked) and the pan in which you intend to bake the lasagna. I used a mozzarella/emmental mix purely for budgetary reasons. They were having a sale, you know I love a sale, and I got two packs for the price of one. My bougie chef soul was screaming that I’m supposed to use the best mozzarella that was flown in from Italy that same morning and grated by hand somewhere really expensive and cool…. but I had already grabbed cottage cheese instead of ricotta so I just went all the way, crossed my fingers and hoped that no one would come and take my culinary degree away! The pan I used is a bread pan from Ikea! Its dimensions are 25cm x 10cm x 5cm. I know, I need to go buy baking dishes. But, peeps, it all worked out I promise.

Assembly and Baking: Begin by spreading a thin layer of tomato sauce at the bottom of the pan. This is mostly so the first pasta layer won’t stick, so you don’t need to go overboard. Next, add a layer (A) of pasta. The strips can be broken to fit, and can overlap at the edges if needed. The next layer will be the cottage cheese and vegetable mixture (B) in a healthy dose, topped by layer (C) which is more tomato sauce but more generously than at the bottom. Finally, top the tomato layer with a sprinkling of grated cheese (D).
Repeat the steps as follows: A, B, D (skip C!), A, C (skip B!), D
Use parchment paper to cover the top of the baking dish and place into the oven for 18 minutes. You can fold and crimp the parchment paper along the sides of the dish to make it fit. Avoid using foil because it will stick to the cheese and pull it off. After 18 minutes, remove the parchment paper and rotate the baking dish in the oven. Continue to cook for 10-12 minutes more, or until the top has browned sufficiently or you can’t stand yourself anymore and you yank it out of the oven….
Please, friends, please…. let it cool for 15 to 20 minutes. Drink a glass of wine… watch some Vikings… whatever. This will save the roof of your mouth but also the lasagna needs to set or when you try to cut it all hell will break loose. Well, i’m exaggerating…. just all the layers will slide apart and all the hard work you’ve done will just taste good but look a hot mess.
And now for notes: There are very few. I would probably add some kalamata olives next time. Mmmmm. I will try it with classic ricotta and mozzarella only at some point but I really did love this version. If you hate mushrooms, travesty, leave them out! But still do the reduction with just balsamic, wine and the oregano. If you have extra tomato sauce left over, save it for the next time or use it with another recipe. It’s very versatile. If you have leftover cottage cheese and vegetable mixture, just eat it with a spoon like I did. It’s super good! Don’t forget to take all the seeds out of the bell pepper. Oh! My crushed red pepper looks weird in the picture because it’s from my mom’s garden and not store bought. So don’t think yours is funny, it’s mine that’s funny honey!


