4. Ye Olde Panniers and handlebar bags

barrykade_1.jpg


I must admit that I have an attachment towards old military gear. There’s something about the durability, materials and unbeatable form and function that tickles me the right way. I also share the love for 30-50s style with my significant other, though I do not ”dress up” regularly in vintage clothes, except for few purpose bought clothes, such as repro US M65 jacket and WW2 Paratrooper boots.

In my native country we still have obligatory conscription for the chromosomally challenged. As a consequence of this, most guys spend between 6-12 months in service. I spent a total 18 months over two years as conscript and NCO, which just tells that I am a bit slow on the uptake. Back in the day my unit was a periodical testbed of new gear which was under consideration for wider use in the defence forces. Basically you just gave the stuff to the conscripts and after weeks of active use in of drills, you got the gear (or what’s left of it) back for evaluation of performance with some honest user feedback on function. Apparently if something can survive a conscript it can survive pretty much everything else and if some poor sod has tried to reinvent the wheel, there’s a good chance that the consript testing the gear would have made a solemn vow to cause bodily harm to the designer. 

This wear and tear stress for the equipment is universal theme for any military gear throughout the ages, meaning that stuff from the olden days will have a good chance of being in useful condition even today. It is actually not uncommon to see that the solid combination of cotton-leather-steel outlasts anything produced today. Yes, it’s on heavy side compared to modern stuff, it can and will get soggy when wet and you have to treat the leather properly, etc. But they are also nearly indestructible and most often utilitarian and well designed products for their intended use. 

Varusteleka.fi

Due to budgetary reasons I could not quite go to the Ortlieb section of outdoor store and find good looking, quality bags for the bikes we are building. Therefore I thought I’d see if something could be arranged from military surplus as they quite often have translateable qualities to civilian life. Not surprisingly Etsy, Ebay and number of blogs have used this approach in abundance so there was examples and ideas around. But before the DIY project and modifications, I went to Varusteleka website and started looking for suitable sized and shaped bags.

iron_sky_wallpaper_by_xool88-d4sip4v.jpg

Varusteleka is a delightfull store in Finland that has a huge stockpile of military surplus equipment, clothes and anything that a (in)sane person would need to make, for example a movie about moon nazis invading the earth (Iron Sky). It has been one of my favourite stores online due to their hilarious product descriptions (also available in English), decent prizes and excellent customer service. It did not take me long to find the stuff I was looking for. As DIY is indeed a bit of an trial and error I decided to hedge my bets a bit and ordered six bags of three different types, some leather straps and a few other things to aid in bulding the bags for the bikes.

Multipurpose bags: 

french_ammo_satchel_0.jpg


”Ammo-satchel with shoulder strap, French, 1950s, cotton with leather insides and details, dimensions: 30 x 18 x 10 cm, 17€ a piece”

When I bought these online, I knew that these bags would probably need some effort to get them into condition as they were around 60 years old and have been in active use. When I opened the Varusteleka parcel I knew that this might take a bit of effort. The leather parts were dry as cardboard, there was something unmentionable growing in the nooks and crannies of the bags (visual and odour evidence), they were completely bent out of shape, the copper studs were oxidized and the metal parts covered by unnamed coarse black stuff. To be fair for Varusteleka, I had no delusions that they would be in better shape. On closer inspection the stitching seemed to be ok, the leather was not cracked and at least most of the studs were in place. 
 

So I decided to start an experiment with the more damaged bag and see how much could be salvaged.

1. Let’s get the bags back to life

lipaslaukku_ennen_pieni.jpg

It was relatively easy to bend the bags coloser to orignial shape but the leather was definitely taken some beating on the way. Also some (most) of the bends refused to settle and would need to be remolded to original shape. Even though the bag looks ok(ish) the picture does not appreciate the amount of grit there was.

2. Enter soap and water

lipaslaukku_pesu_pieni.jpg

A thorough wash with warm water and gentle detergent removed most of the muck, algae, mould and bodily fluids from the bag. Then the bags were dried with some cartboard in the inside compartment to keep the desired shape during drying of the bags.

3. Resurrection of the leather with baby-oil

lipaslaukku_oljyt.jpg

After the leather parts had dried, I soaked every leathery part with generous amounts of Natusan baby oil (paraffin) in and gave it a thorough rub. One bottle of baby oil was hardly enough for the two bags, as the leather really sucked everything in. As far as conditioning goes, the next step is to keep leather properly oiled and to find something to waterproof the cotton canvas. At least the leather came alive and is nice and supple again.  

4. Bit on DIY and testing what the bags can do

lipaslaukku_muokattu_ja_ladattu_2.jpg

I put the worse of the two under a bit of experimentation and de-stiched one of the cotton canvas dividers to make one larger compartment and turned it alongside the front to have two mini-compartments. I just have to figure a neat way to make the attachment a bit more permanent. Now I can easily have my camera (second from the right) and wallet in the smaller compartments, cell phone in the middle slit, and plenty of room for a book, canteen or a few 0.5l liter beer cans. When the cover is closed the book is is nicely tucked away from the elements, even though it is now sticking out. I still have to do some work one the copper studs to make them shine though… I took the bag out a few times and I was surprised how nicely it carried as shoulder satchel while biking. My usual houlder bags keep on sliding but this one just stuck to where it was supposed to. I think this is going to be my  emergency/spare part/tool bag on the longer rides. 

I spent maybe a total of 30 minutes of elbow grease per bag, not bad considering that they are now in a condition that allows public use. Next I will do some modifications on the bag for mounting options for either as pannier, saddle or handlebar bag. Or all if possible, we will see…


Panniers, DDR ”ostalgia” style 

nva1.jpg

Nationale Volksarmee (NVA) Sturmgepäck with Strichtarn ”camouflage”. These were a nice find, at 6€ each, in prime condition and inbuilt waterproofing and good attachment options. I added only two leather straps between them (2,5€ each) and presto! Ready to go as throw-on-the-rear-carrier panniers. Both came with assortment of straps which I have to figure how to use best. There’s double-loop attachment options for both sides and bottom, so it’s relatively easy to add stuff on the outside. At a relatively hefty size of 30 x 30 x 12 they are best suited as panniers, though I think I will tweak them so that they can be easily carried over the shoulder as well. 

nva2.jpg

nva3.jpg

nva4.jpg

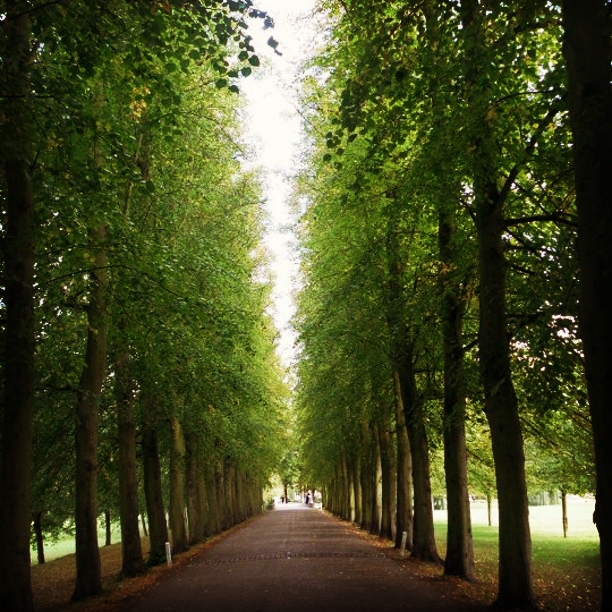
The next step is to start thinking of handy ways to attach all of these bags to our current and future bikes. Unfortunately the ”on-bike” pictures will have to wait for a bit. It’s storming outside second day in a row and there’s the Eurovision on the telly. So here, a motivational summer photo from Leiden instead.

2012-06-14-447.jpg


Pictures:

Top: Cards by Barry Kade, a Rotterdam street artist who I met while having a haircut.

Iron Sky poster by XooL88: http://xool88.deviantart.com/art/Iron-Sky-Wallpaper-289766335

French ammo satchel : Varusteleka.fi


Hyvinvointi Liikunta DIY Vastuullisuus

3. A complicated bike project

wp_20130816_007.jpg

So, a few years onwards and we are at 2013. Couple years on our trusty single speeds and I started to get a feeling that we had found the practical limits of the steeds. We kept doing longer and longer treks in our surrounding area and at one point we found that the butt-department endurance cannot be trained to the extent of your physical condition. A trek of 40 km is ok but at a 60 km one can really start feeling the hind-department numbing rapidly. During our rides on the coastline dunes I really started to be envious to the racers and trekkers whizzing past us left and right.

Our bikes were as good as they ever were (a bit rustier at this point) but they never were designed for long distances or speed.

So now we had a new purpose: to go farther and faster!

Trying to learn from my past mistakes I did not run to the local bike dealer with credit card in hand, but started thinking what I want and started asking what the significant other would like to have. Luckily me and the S.O. are usually of same mind on style and purpose, otherwise this project would still be on the table.

Well, we knew that we want to have something like a trekking bike, relatively good speed mixed with comfort, and the bike should allow at least limited amount of cargo. Ideally the bike would be versatile in such a way that carriers and panniers could be added when necessary. This mix is not too hard to find, for example Cinelli and Koga-Miyata have a number of modern models which would fit to the description easily. The second part was slightly less rational: style. Now I am not a terribly stylish or fashionable person, but some things just get stuck in my head. In this case it was vintage bikes and their construction. 

I have always had a soft spot for 30-50s style and here in the Netherlands it was the first time that I would see proper vintage bikes in quantity on the streets. Some were naturally in very shabby condition, but plenty of people have put the bikes back to their prime. Now in a vintage constructed bike there are lots and lots of details which really please me.

The frame is lugged, meaning that individual parts are joined with a separate, usually ornate/chromed piece, instead of a simple TIG weld. Also quite often the lugs are ”lined”, highliting the shape with contrast paint, as shown in the comparison picture below.

seat_cluster_0.png


Another eloquent detail is in the forks. Older styled forks are manufactured from seprate parts whereas most new forks are unibody. 

forks_0.png


Our interest towards vintage style bikes was further amped up after a couple of friends came by with a delightful pair of vintage Koga-Miyata road racers. Both had absolutely deliciously shining steel and chromed parts, lugged frame and forks. Since then my S.O. has had to suffer my boyish enthusiasm on silly little details I keep on showing her from the internet. At least her fashion sense agrees with mine. 

I knew that I was hooked, but a bit dismayed at the same time. I could not figure where to find the bikes fit for our purpose, and in the style we were now most interested. All those beauties I had seen on interwebs or could spot on the streets were hot-blooded road racers in their original or fixie forms. Not suitable for trekking of any sort. It seemed that speed combined with load carrying on a vintage frame was very hard to combine.


randonneur_lovelybikes.jpg

So the search continued and I started to look on what type of bikes people ran on long distances with packs on the bikes in the olden days. Names like René Herse, Jan Heine and Alex Singer started to pop out around performance sport called Randonneuring that originated in France. It was founded around the same period as the Tour de France, but whereas the Tour was for money and glory by working class athletes, randonneuring was upper class endurance event where the aim was to get to goal within specified time. The original randonneuse event, or brevet, is Paris-Brest-Paris (PBP) which was first completed in 1891 and is competed every four years.

pbp_start.jpg

A brevet is an unsupported event, meaning that all you need is carried by yourself or bought along the route, including all the repair gear, food and water. The PBP route is 1200 km which needs to be completed within 90 hours or just less than four days. Sounds crazy? It is. Think about it, without a single stop the average speed needs to be 13,3 km/h. If you rest for 5 hours a day, the average speed is close to 17 km/h for the remaining 19 hours, non-stop. The insane bit comes from the fact that the record for the event is just over 50 hours. Gladly should I or we be interested in randonneuring, one can start with shorter 200 k/13 h rides and advance step by step to longer distances. Records aside, the interesting bit for me came from the fact that these long runners often carried their own necessities, which racers seldom can do without compromising steering and balance. The Frenchmen solved this problem by developing a new kind of bike, the randonneur.

rene_herse.jpg

Perhaps one day I will understand at least a bit about bicycle geometry, but for now I am just parrotting what I have read. As far as carrying capacity goes, these bikes had been optimised in such way that the handlebar could take considerable weight without compromising the steering. Should you put extra 10 kg on a racer handlebar it would became unstable indeed. Furthermore, randonneurs were almost legendary for their comfort without sacrificing too much of the speed. This was achieved by larger tires, extra long fenders (to ward of rain), integrated lights and by relaxed low-trail geometry. You could say that they were less aggressive than roadies but they compensated the speed by allowing the rider to be on the bike for insane amounts of time. 

In the olden days these bikes were built by artesans and each bike was customised according to the customer’s wishes, including the frame, wheels and accessories like carriers, fenders and lights. In the modern age such workmanship is rare and far between, hardly any modern bike has lugged frame nor the aesthetics of the old randonneurs, except for some small builders around the world serving an exclusive clientele. Since the beginning of the millennia, there has been some renewed interest to these beauties in the old continent, which should make it easier to find a modern rando. Lucky me! Not. After drooling for weeks of these beauties on the US side of the the Atlantic, I started to realize that the European counterparts would be also rare and exclusive, but also on the very, very expensive side. No such thing as off the peg selection conveniently available at your local dealer. Even the modern iterations of randonneurs, which in theory could fit to the budget (and bit in the style), were out of stock for the winter season.

Ergo, practical and economic solution would be to find a genuine rando and put it back together or find a frame that would be as close as possible to randonneurs and build it from the ground up. 

So I hunted down some local bike shops specializing on custom builds, but for one reason or another that lead to nowhere. Either the builder would be reluctant to go for a vintage frame (which I yet had not been able to find for both of us) or suggested that we’d go for a complete built modern trekkie for practical purposes (warranty etc.) and just pimp some details. I started to feel that this project is not going to end well, or actually end at all. After some time of lurking on numerous internet forums with randonneur topics, I found threads discussing on contemporary UK framebuilders. A number of classic brands like Raleigh, Pashley, Merlin and Mercian originate from the UK and the British have their own version of Randonneuring called Audax. This is when I found Bob Jackson.

bob_jackson_logo_headtube.jpeg

They do classic, hand made lugged frames for touring, racing and Audax. Better even, they do all of their frames either fully custom or as off-the peg versions. A customer can choose the model and size and then provide a few additional details such as the paintjob of their choosing (S.O. was completely bought by now). I now had a chance to get a lugged frame, with a semi-custom paintjob, for just under 600£. I was bought.

The problem was that I did not have a builder who would be willing to make us the bikes on a naked frame and more importantly in light of my past experiences on choosing a bike, we would not have a chance to try such frame in the real life with wheels on. 

lola-bikes-and-coffee.png

I begun the search anew and found a local establishment called Lola Bikes & Coffee who promised a possibility for custom builds on their website. I contacted them and started the discussions on a custom job. On our first visit, we trialed number of modern racing and trek bikes in order to get an idea what size and geometry might work for us, and what definitely would not. Then I contacted Bob Jackson and asked for estimation on what size they would suggest based on our body measurements and the key geometry on the bikes we would be most interested in. Then it was a matter of comparing the geometries on the bikes which suited us well with the B.J. specifications. The builder gave a go-ahead for two World Tour frames and drafted the budget and a list for the parts based on our thoughts and aims with the bikes.  

Now the project is at the point where we have bought the frames and are waiting for the paint to dry for the shipping from UK. Meanwhile we have put the parts list together with the builder. Unfortunately our budget will not permit an authentic build, so for now it will be a mix of modern tech and old style. I think this will be just a start for future projects 🙂 Actually the best part is that I and S.O. will participate on putting the bikes together under the builders watcful eye and guidance. So we should get a good hands-on lesson in how the bikes are built and taken apart for maintenance or further upgrades. Not a bad deal.

In the end we should have vintage styled bikes for light and heavier touring. I just hope that everything goes according to plan…

When the project goes forward I have thought of documenting the buld in detail. I should have plenty to write about that when the time comes. We also have a bit of a DIY project on panniers and handlebar bags coming up so that’s a whole nother story. In the meanwhile I will perhaps write about something different altogether or just post some pictures to past the time. Toodle-loo!

6tag_060913-113358.jpg

Pics:

Leiden Windmill

Seatpost cluster lugged (left):http://www.oswaldcycleworks.com/gallery.php

Seatpost cluster right TIG welded (right):  http://threadbikes.com/?cat=1

Lugged fork (left): http://www.bikeradar.com/gear/article/cheap-commuter-and-city-bikes-head-to-head-36100/

Unibody fork (right): http://www.bikerumor.com/2013/02/19/long-term-review-volagi-viaje-steel-road-bike-desguised-as-a-commuter/

Vintage roadbike: http://lovelybike.blogspot.nl/2012/01/randonneur-experiment-review.html

Paris-Brest-Paris Early times: http://gccfla.org/brevet/brevets.html

René Herse rando: http://www.cycleexif.com/rene-herse

Bob Jackson headtube logo: http://www.velobase.com/

Den Haag Hollands Spoor trainstation

Hyvinvointi Liikunta Mieli